Pages

September 26, 2011

10 Baseline ways to save more

Hello, my name is Amanda, and I was a coupon skeptic...

Hi, Amanda.

My favorite couponer from TLC's Extreme Couponers. Her husband lost his job, but her stockpile kept them fed for over a year. Here, she is recylcing bin diving for coupons.... I am not this committed.
It's true. I really thought that these people were making up their stories because so many of the coupons you see say "Limit one coupon per purchase," "May not be combined with any other offer," or "Limit ___ number of coupons per customer."


But with these simple rules that I learned, sometimes learned the hard and expensive way, hopefully you can get a sense of how to get started!

I'm excited for you!!


Base 1: Learn what coupons can be combined with what other offers.

Manufacturer coupons (the ones in the Sunday paper or can be printed online that can be used at any store) cannot be "stacked," or used with a similar coupon on one item. But, Manufacturer coupons can be stacked with Store Coupons to increase your savings.

For instance, Gain detergent is $6.99 at Hyvee. I have a Manufacturer coupon for $2.00/1. I cannot use two of these coupons on this one bottle of detergent. But, if I have a Hyvee coupon for $2.00/1 (typically found in the Wednesday paper circulars and ads), I can use this coupon and the Manufacturer coupon for a total of $4.00 savings.

Also, find what stores will double coupons in your area. I have one grocery store in a 30 mile radius that will double coupons up to $0.50. (So $0.50 coupons become worth $1.00, but $0.55 remains $0.55. Does that make sense? Who knows if I'm explaining this clearly...)

Base 2: Make a list of items that you will never, ever, EVER buy if its not your particular brand.

I really like Secret deodorant. I will never use any other brand of deodorant. I really like Maybelline mascara. I will never use any other brand of mascara.

Hello, my name is Amanda, and I am a brand snob.
Hi, Amanda!

These are things, deodorant and mascara, that I will not buy outside of these brands unless I plan to donate it. When you start couponing, and if you're not disciplined like me, you tend to get carried away with the amazing deals. You will buy frivolous stuff, but if you can be disciplined and stick to your brands when you deem them absolutely irreplaceable, you'll save yourself money, time, and guilt later.

Base 3: Try non-name brand goodies.

I'm serious. Unless an item satisfies Base 2, try new brands, that may not be as popular. Soda, pasta, canned goods, toothpaste, toothbrushes, body wash, and (some) laundry detergents all have identical ingredients (yes, I have checked). In fact, some of the canned goods will have lower sodium than the name brand goods! So jump outside of your comfort zone, and try a new "brand."

Just do it.

Base 4: Once you start couponing, keep a log book.

I have a green spiral notebook filled with grocery items categorized by the lowest sale prices offered by stores, the date these sales occurred, the coupons I used to get the best deal, and the price per unit. This log ensures that I will never pay more for an item than I have in the past.

For instance: Charmin Bath Tissue (24 rolls). Bought at Hen House on 7/24/2011. On sale for $5.75. Used $0.25 coupon that doubled to $0.50. Paid $5.25. $0.22/roll. (Bought 2 packs)

Unless I run out of toilet paper completely, I will never pay more than $0.22/roll of toilet paper, again. The deal happened once; it will happen again.

When I first started couponing, I would call any one who went shopping with me to tell me if we got the item for less than the current sale price. Write it down. You will save yourself, and your shopping buddies, a lot of headaches and annoyance.

Base 5: Be willing to go to multiple stores.

I go to 3 grocery stores and 2 pharmacies every week. I spend 3 hours shopping a week, including driving time. It's worth it when you get the best deal, and many grocery stores are a stone's throw away from each other.

Base 6: Make a budget and stick to it

When I first established my budget before couponing, I has $100/week to spend on groceries and necessities. I have not spent $100/week, cooking for 2-4 people (my friends enjoy my cooking) a day for at least 2 meals, since I began couponing. Now, I use the overage to buy useful stockpile items, like pudding, ketchup, cereal, shampoo, toothpaste, etc., and donate these items to my city's homeless shelters and food banks. Point is, you can get a lot on a limited budget.

Base 7: Make a weekly meal plan on items that are on sale that week

For example: This week, canned beans, ground beef, and Kraft cheese is on sale. I'm making chili.

If there is nothing on sale that you believe you can make a dinner out of, reach into your stockpile. This will be rare, trust me!

Base 8: Limit your time spent with coupons

Seriously, try and stay away from your computer or Sunday paper after you save your first 70% on weekly groceries. Like any hobby, it can take over your life. Use in moderation. I speak from experience.

Hello, my name is Amanda, and I am a coupon addict.

Hello, Amanda. Amanda... Amanda... PUT THE COUPONS DOWN!!! Walk away...

This may be a true story... I plead the fifth...

Base 9: It's almost always cheaper not to buy it

Ty's words of wisdom. Often he is my voice of reason when I'm distracted by a 50% off tag.

When I first started couponing, I bought things because I could get them for a great deal. I would break Base 5 because I thought, "It's only a few dollars over." A few dollars adds up each week, even if you're getting things for greater than 70% off. And, there is no greater sense of guilt than seeing those items in my stockpile that I have never, EVER used. Shame!

Donate it and move on... if to assuage your guilt more than anything.

If you can live without it, ask yourself why you are really buying it. Unless it's a splurge item, I try to say no. Or my voice of reason says no for me.

Base 10: Donate your extras

1) Yay, I have 10 items. I am just neurotic enough that if I had thought of 11 I would go back and delete one to post later.
2) No body needs >10 tubes of toothpaste a year. Unless you are the Duggar family and have 19 children should you keep that much toothpaste.

Items like toothpaste will always be on sale, and you will always get them for $0.50-0.75. But instead of not buying the toothpaste after you have a sufficient stockpile, please consider buying and donating.

Why? Isn't that wasting my money?

Let me tell you a story...

I volunteer as a medical aid at a free clinic. The majority of my patients are homeless, and cannot afford their next meal, let alone a tube of toothpaste. On a somewhat regular basis, I bring in soap, toothpaste, deodorant, toothbrushes, and shampoo. When the "patient" leaves for the day, they get one of each item.  As I was handing out toothpaste at the door of the clinic, one of my patients looked at me and said, "I've never had my own toothpaste. I never thought I would even hold Crest toothpaste."

$0.50 for a tube of 4 oz. Crest toothpaste. THAT is not wasting your money.

Well, my friends, I hope you find these baselines helpful when starting your couponing journey. Leave a comment if you have any questions!

September 24, 2011

Couponing Trip 9/23

New feature of Doctoring it up! Little known fact about me, that I suppose I am making a more well known fact by posting it on the world wide web, is that I am a semi-extreme couponer.

I say "semi" because, no, I do not walk out of the store 100% of the time with 100% savings. (I've only been paid by the grocery store in coupon overage twice, amounting to $4.53 total) But, I do have a stockpile (that is slowly taking over what little extra space I have in my apartment) and will walk out of the store saving 50% or more on my weekly groceries.

Some of my friends have asked me to share my tricks of the couponing trade so I thought what better than to post it on my blog.

Is couponing a word? Can coupons be active?

I vote yes, even if Microsoft Word spell check disagrees.

So here are some links for coupons that aren't found in your paper along with my shopping list, so you can get an idea of what this stuff is all about! In the next few days, I plan to post my "rules" or things that I wish I knew before I started couponing. (Take that Microsoft Word spell check!)

Couponing. Couponing. Couponing. I feel rebellious!

 $0.50/1 Old El Paso product
$1.50/1 Macaroni Grill Frozen Product
$0.55/1 International Delight coffee creamer

My trip this week...
Sorry the photo is overexposed... that 8 am light is stronger than my curtains and blinds!
3 Hamburger Helper meals, 5 assorted Ziploc storage bag boxes (20ct bags), 5 Rice-a-Roni (Ty's favorite side dish), 2 feminine products, 3lbs of onions, 2 Macaroni Grill Frozen dinners, 6lbs chicken breast, 2 boxes taco shells (for Taco Friday dinners!), 2 gallons vegetable oil, 1 International Delight Coffee Creamer, Softsoap hand soap.

Retail price: $78.32

I paid: $36.07
Total savings: 54%

Combined with other items in my stock pile... I will have all the ingredients for this weeks menu plus extra items to add to my stockpile.

Proof is in the pudding.

Hope this teaser was enough to entice you to come back to learn more!

September 23, 2011

Bella and her green ball

I was a big hero a few days ago. A hero deserving of a few howls of joy and a couple of puppy kisses.

I found Bella's long lost ball. Bella, my 11 month old Shiba Inu puppy, is my pride and joy. I mean look at that face.

Too precious.

The ball had been missing for a few months. Honestly, I thought it got lost in the woods behind the apartment. Bella was crushed, I think. Maybe a little glimmer in her eye was muted by her loss. A glimmer that sparked again when I found the ball under the couch while vacuuming.

But she didn't want to play fetch. No, she wanted to taunt Ty and I with it.

This is my ball

I try to grab the ball.
Haha! ....my ball.

Go ahead, try and take it.

Too slow!


Squirrel!


Huh... Ummm... Errrr...
 
What was I saying? 


Oh, Bells, you're too precious!

September 4, 2011

Nana's Peach Pie

Besides her chocolate cake, Nana always had a peach or apple pie for dessert after her delicious and elaborate dinners. Considering it's summer, and here in Missouri peaches are plentiful for under $1.00/pound, I decided Nana's peach pie would grace my delicious, not so elaborate dinner table.

Like most Americans who are also football enthusiasts, this weekend was our fantasy football team draft. There is no better excuse to eat homemade pretzels, layered dip, or pie, than watching baseball, while drafting your perfectly planned team.

Just as exciting, if not much more, Ty's parents were coming through KC to stop by for dinner. Again, no better excuse for peach pie.

Actually, I can't think of a better excuse for peach pie, than...well... it's peach pie.

I always make my filling first. I've worked really hard to perfect my peach peeling techniques, so here is a fast tutorial! First, cut an x across the entire peach. Everyone says over the bottom but cut the whole darn thing... it makes peeling soooo much easier!

Then dip the peaches in boiling water for 1-2 minutes. You'll see the skin start pulling away from the flesh (um ew, that was a gross analogy for peachy goodness).

Immediately, drop the peaches into ice water. See the skin is already starting to peel!

Peel away...

Then slice them up!

Next, mix the fruits, sugars, and lemon juice so the filling will have more time to "macerate" (or get more delicious) while I'm making my crust.

Add your peaches, brown sugar, lemon juice, flour, pinch of salt, and cinnamon.

Mix well... um... YUM!! Taste to make sure it tastes right... or because you can't resist. Let sit, if you can, until your crust is ready.

Cut your flour, sugar, salt, and shortening until it looks like this... I really have no idea what course meal looks like, but everyone says that's what pie crust looks like at this stage. I guess when I really do see course meal, I'll think, "Huh, looks like pie crust." (Oh, and Pioneer Woman has suggested butter and leaf lard for the "best crust" per a wonderful blog about pies and pie crusts, but gee is it hard to find leaf lard, and I like my crust. I will try it next time.)

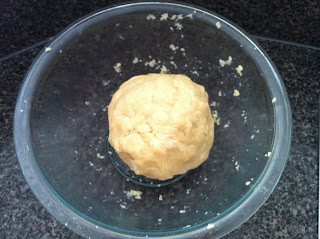
Then add in just enough cold water until it comes together.

Divide dough in half and roll out each. Sorry mine looks like a square; maybe it looks like a square because it is. Place in pie plate.

Pour out your delicious filling. And maybe take another taste. Dot with butter (This is the only time I used salted butter... well, dotting pies and smearing my toast in the morning. But, whatev. I keep it in the fridge for this reason only. Yummy toast is just a bonus.)

Cover with other rolled out crust. Cut out slits so your pie can breath. Brush with egg wash (and maybe sprinkle some more sugar on the wet crust. I think it adds pizazz . And finally, bake that pie!

Pie number one:
And, pie number two... with ooey gooey goodness.

Thank you, Nana, for your chocolate cake, peach pie, and so many delicious memories.


I think our football enthused friends (including the Mayme and Mike's bun in the oven) liked the pie, and I know Ty's parents... specifically his dad... loved the pie. And really what's not to love: flaky crust, gorgeous, ripe (and cheap!) Missouri fruit, sugar, butter? I find no flaws in this plan.

Nana's Peach Pie
4 lbs. peaches, peeled, and sliced
1/2 c. brown sugar
1 t. lemon juice
pinch of salt
2 T. flour

2 c. flour
2/3 c. shortening
pinch salt
2 T. sugar
5-7 T. cold water

2 T. salted butter

Mix all filling ingredients. Let sit until crust is ready.

Combine flour, salt, and sugar. Cut in shortening until it resembles course meal. Add in water slowly, until dough just comes together. Divide dough in half and roll out each one inch diameter larger than the pie plate. Place dough in pie plate. Pour in filling. Dot with 2 T. salted butter. Place second rolled out dough on top of pie. Crimp edges.

Bake pie for 45 min at 425F.

Let cool for at least 4 hours before slicing.

Enjoy!

August 26, 2011

Doctoring up Doctoring it up

Hey guys,

I want to take this whole blogging thing more seriously. I will be revamping the site and my content in next month. Doctoring it up will now include ways to doctor up your shopping with coupons, your weekly meals with healthy but delicious comfort foods, and of course your weekly desserts. Hope you all enjoy the changes.

Love,
Mandie

Sometimes simplest is best...


Have you ever not gone to the gym for about a month? Then, when you (I) realize that it's been that long (maybe like me when your pants fit just a little tighter), you (I) have the hardest time getting motivated to get out of bed early enough to hit a one hour work out before work. But I'm not here to talk about my failed work outs...

Maybe...

I'm here to talk about how my lack of exercise had triggered a lack of baking... Yes, I am human, and I cannot have cake, cupcakes, cookies, etc in the house without devouring them until my stomach refuses to stretch any more.

But, I am back, and what better way to start baking again than with a simple honey wheat bread?! Just like I needed to start slow when I jumped back on my treadmill (or I wasn't motivated enough to start faster... I plead the fifth), I'll start slow with what I really know.

This recipe came from my simpler times at the county fair pageants. This honey wheat bread won first prize at the Boone County Fair when I was competing for Fair Queen. (Perks of competing in a fair pageant: judging BBQ, baking, and ham contests!) I loved the bread from the moment I smelled it. It's not yeasty, and not too sweet. Just a soft, lightly sweetened bread that makes me feel better about the carbs by being a wheat bread. It won my heart... and the ribbon.

Honey Wheat Bread
yields 2 loaves

- 1 package rapid rise yeast
-1 t. sugar
-1/2 c. warm water
- 1 c. milk
-1/4 c. water
-1/4 c. melted shortening
-1/4 c. honey
-2 t. salt
-2 c. whole wheat flour
-3 c. bread flour
-1 T. room temperature butter plus additional for buttering after baked

Dissolve yeast and sugar in warm water. Let sit for 5 min. Combine milk, 1/4 c. water, shortening, honey, salt, and wheat flour in stand mixer. Mix in yeast mixture. Let rest for 15 min. Slowly add in bread flour. Only add enough to make bread pull away from sides and bottom of bowl. Knead for 5-8 min, or until the dough springs back when pinched. Place the dough in a bettered bowl, and trun to coat. Cover the bowl with plastic wrap and let rise for 45 min or until doubled.

Punch dough down. Divide dough in half and roll out each half to form loaves. Place loaves in buttered bread pans. Spread butter on top of dough. Cover with plastic wrap and let rise 30 more min or until doubled.

Preheat oven to 375F. Bake bread for 20-30 min, or until tops are golden and bread sounds hallow when "thunked" (yes that's a technical term for flicked, or tapped). Butter the top with additional butter. Let cool completely before slicing.

Enjoy!!

June 2, 2011

Throwdown Peach and Blackberry Pie

Ignore the messy cutting board underneath... focus on how delicious that pie looks!!

While I'm not a huge fan of Throwdown with Bobby Flay on Food Network, some of his recipes sound too good to resist. And me, being the biggest fan of pies out there, knew when he threwdown with two adorable old pie ladies and won, that I had to try this recipe out! 

Never before have I been more proud of a pie. I mean really, it's gorgeous. It's the type of pie that I would be proud to take to the county fair and would be surprised if I didn't come home with some sort of ribbon. The crust is a GREAT recipe: really easy to work with and sooooo flaky! I skipped the alcohol in the fruit simply because it's not my style, but extra peach and current flavor wouldn't hurt I am sure. I brought this pie with me on a visit to my boyfriend's parents, and we all agreed that this is a pie we would pay money for!

Throwdown Peach and Blackberry Pie
recipe adapted from Bobby Flay, Throwdown.

Crust:
2 1/2 c. flour, plus more for rolling
2 T. sugar
1/2 t. salt
10 T. chilled butter, cut into 1/2 inch cubes
1/2 c. chilled solid shortening, cut into pieces
4-7 T. ice water

Combine the flour, sugar, salt in the bowl of a food processor and pulse a few times to combine.

Scatter the butter and shortening over the top of the flour mixture and pulse until the mixture resembles coarse meal.  Add the water a few tablespoons at a time and pulse until the dough just comes togehter.  Remove the dough from the machine and lightly knead on the flat surface until it just comes together.  Form into a disk, wrap in plastic wrap and refrigerate for at least 1 hour.
Preheat oven to 375F.

Filling:
3 lbs mixed yellow and white peaches, peeled pitted, and sliced
1/3 to 1/2 c. brown sugar
1/3 to 1/2 c. sugar
1 1/2 t. ground cinnamon
1 1/4 t. ground ginger
1/2 t. ground fresh nutmeg
2 T. peach eau de vie (I didn't use this, but I'm sure it would only make the pie better)
1/4 c. cornstarch
1 c. fresh blackberries
2 T. cassis (again, didn't use)
2 T. cold butter, cut into small pieces
2-3 T. heavy cream
2-3 T. sugar

Combine peaches, sugars, cinnamon, ginger, nutmep, peach eau de vie and cornstarch in a large bowl and mix until well combined. Toss the blackberries with the cassis. Let sit for 10 min, then use a slotted spoon to spoon the berries into the peaches and toss. 

Divide the dough in half and roll each half out on a lightly floured surface.  Line pie plate with one rolled out dough, scoop the filling into the lined pie plate, and pour extra juice over filling.  Dot with butter. Cover with other rolled out dough. Cut slits to vent out steam. Press edges down and crimp. Bake pie for 1 hour. Cool pie at least 3-4 hours.

Enjoy!

May 30, 2011

iCarly and Coconut Cream Pie

I will have to admit my guilty pleasure in life, o.k. besides the Harry Potter series. I like to watch iCarly. Yes, iCarly, the Nickelodeon sitcom about the kids with a web show. Sometimes when the news gets just a bit too, well, news-y, I prefer to escape to a simpler form of entertainment-one that includes slap-stick comedy, puns, and teen crushes.


At any rate, I admit this because recently I saw an episode in which Sam, Freddie, and Carly search for the perfect coconut cream pie recipe after their favorite pie shop closes. First, I thought, why coconut cream pie. Then I thought, I've never had coconut cream pie!! Is their obsession rightly justified by an amazing dessert that I've never tasted before? I had to find out. And, after a few days of searching the internet, I found this wonderful recipe.  I have to say, I originally chose it because the restaurant from which it comes from is in Seattle (where iCarly is supposed to be set). Regardless, I have found that, yes, the iCarly crew was justified in their hunt. Coconut Cream Pie is delicious! Yes, this pie has many parts, but believe me, the work is fast and is well worth it!

Triple Coconut Cream Pie
recipe from Tom Douglas' Seattle Kitchen cookbook


For the crust:
1 c. plus 2 T. all-purpose flour
1/2 c. sweetened shredded coconut
1/2 c. butter, cold, diced
2 t. sugar
1/4 t. salt
1/3 c. ice water, more or less, as needed

In a food processor, put all the ingredients, besides water. Pulse until you get something that looks like course meal. Add water 1 T. at a time, pulsing after each addition, until dough holds together when pressed between fingers. Bump the dough out onto a large sheet of plastic wrap, press into a disc, cover with plastic wrap and chill for 30-60 min.

Roll out dough on a floured surface. Place in 9" pie pan. Trim excess. Chill at least 1 hour before baking.

Preheat the oven to 400F. Place a sheet of aluminum foil in the pie crust, extending over edges, and fill with dried beans or pie weights. Bake for 20 mins until rim is golden. Remove from oven, discard foil and weights or beans, and return pie crust to oven. Bake for 10-12 more min or until golden brown. Let cool completely on a wire rack before filling.

For the coconut pastry cream:
2 c. milk
2 c. sweetened shredded coconut
1 vanilla bean, split in half lengthwise (I didn't have any, so I just used a teaspoon of vanilla extract and it was delicious)
2 large eggs
1/2 c. plus 2 T sugar
3 T. all-purpose flour
1/4 c. butter, softened

Combine the milk and coconut in a medium saucepan. Scrape the seeds from the vanilla bean and add seeds and pod to the milk mixture (if using vanilla extract skip this step, but do not add the vanilla now!). Place the saucepan over med-high heat and stir oxxasionally until the mixture almost comes to a boil.

In a bowl, whisk together the eggs, sugar and flour until well combined Temper the eggs, then add the warmed egg mixture to the saucepan of milk and coconut. Whisk over med0high heat until the pastry cream thickens and begins to bubble.  Keep whisking until the mixture is very thick, 4-5 min more.

Remove the saucepan from the heat.  Add the butter and whisk until it melts. Remove the discard the vanilla pod (this is when you would add the vanilla extract if not using the vanilla bean!). Transfer the pastry cream to a bowl and place it over a bowl of ice water. Stir occasionally until cool. Place a piece of plastic wrap directly on the surface of the pastry cream to prevent a crust from forming and refrigerate until completely cold. The pastry cream should have thickened as it cooled. Fill cool pie shell with the chilled pastry cream, smoothing the surface. Top with whipped cream and garnish.

For whipped cream:
2 1/2 c. heavy cream, chilled
1/3 c. suagar
1 t. vanilla extract

In electric mixer with whisk attachment, whip the heavy cream with the sugar and vanilla on medium speed. Gradually increase the speed to high and whip to peaks that are firm enough to hold their shape. Spoon onto and smooth over the pastry cream. Reserve some whipped topping for pipping if desired. 

For Garnish:
2 oz. sweetened shredded coconut, toasted in a 350F for 7-8 min

Sprinkle on top of the pie once whip cream is piped on.

Enjoy!!!!

Surviving the Lion's Den

I apologize for not posting most of this month. I have been locked in a cave, a den of lions as it were, studying for a USMLE Step 1 board exam that was chosen for my Pathology final. Never before have I been so frightened of a piece of paper with questions on it! We were given this month to prepare for this intimidating test, and I have seen more of my office than I care to admit! But just as God delivered Daniel from the lions, He has delivered me from this test!! And I can finally say, "I AM DONE WITH PATHOLOGY!!!! I AM A YEAR 4 MEDICAL STUDENT!!!!!"

You may be asking, did she bake at all during studying?  Well, duh! Please enjoy the coming posts as I recount my baking adventures when I managed to occasionally escape from the lion's den!

April 29, 2011

Getting my crumpet on! Congrats William and Kate!

So like millions of Americans, I woke up at 3:00 am to watch the full coverage of the Royal Wedding. And what better way to celebrate, than with traditional English flair: tea and crumpets.... yes... seriously.
of course, crumpets with English Teatime Bigalow Tea

I have never made crumpets before, and frankly, I was petrified. Every recipe I read said "try at your own risk," or "there is a reason why these never took off in America." But I will never be one to balk at tradition... so like Kate and William did an hour after I enjoyed my crumpets, I took the plunge. Hopefully, their marriage will be as successful as this recipe. It was easy, quick, and delicious. I will definitely make these again, and well before the next royal wedding. :-)
The sun was barely peaking out from the trees when I sat down to enjoy them!

Traditional English Crumpets
Makes 2 dozen crumpets

-1 pkg instant rise yeast
-1 T sugar
-2 T powdered milk
-1 c. warm water (110-115F)
-3 c. all-purpose flour
-1 1/2 c. warm water
-1 1/2 t. salt
-2 T warm water
-1 t. baking soda

Mix together the yeast, sugar, milk, and 1 cup water. Cover with plastic wrap and let bloom for 10 min.

Mix in the flour, salt, and 1 1/2 cups water. Stir until just combined. Let rise in a warm place for 1 hour. (And watch the royal family parade from the palace to the church... side note, I am starting to wear hats to every occasion)

Add and stir in 2 tablespoons water and baking soda. Let sit for 10 more min. Meanwhile, preheat fry pan, well oiled.

Using well oiled cookie or biscuit cutters, pour dough into circle mold on the hot fry pan. Cook for 5-8 mins or until little bubbles form and pop on top. Remove mold, and flip crumpet. Cook 1 more minute to brown the other side. Enjoy!

I added whip cream, blueberry sauce, and strawberry glaze to represent the British flag colors. But these are great with butter and jam... and of course.... tea. :-)

April 14, 2011

How can it not feel like home with "home"-made bread?

There is something about the changing of seasons that really makes you miss home... Maybe it's the fact that I didn't want to spring clean MY home. But seriously, with the warming weather breaking through (and my tomato plants breaking through their warm soil home!), you can't say that you don't think of springs past. The springs filled with playing on swing-sets, and finally being able to take off that light jacket so you can swing uninhibited. When your biggest stress was how far could you bike ride and still make it back in time for dinner. Yep, it is those times I'm missing.
Yay for baby tomato plants and herbs!!

In the kitchen, my favorite spring time memories (that always extend into summer as well) are the smells of mom canning her strawberry jam and apple butter. Thinking about the jam and butter, I remembered how once I ate half a loaf of home-made bread and a whole jar of strawberry jam in one sitting. Then it came to me: make some home-made bread to feel more at home this spring.

Well, I kinda did more than just make a loaf of homemade bread. I made 2 loaves of cinnamon raisin bread and a loaf of honey wheat... and (since there was a sale on strawberries) a strawberry-apple galette.

Unfortunately, I didn't get to grab a picture of my goodies. Time for me to eat my words... if Ty is sitting on the couch watching me bake and he doesn't immediately jump up to ask for a bite when it comes out of the oven, I start to question why. Immediately, I run to him and make him try my baked good with me and ask tons of questions about the taste, texture, and why he wasn't waiting for it to come out of the oven with me. Obsessive... yes. But, that's what you get for being an over-analytical medical student. And for some reason, he tolerates my crazy.

Anyway, by the time I grabbed my camera, half the galette was gone and my bread was in the toaster with butter and apple butter standing by to be spread on it. I'd say that the recipes were a success!  So, I'll only share one recipe for now, and the others shortly to follow. I think everyone knows how divinely tempting the swirls of cinnamon-raisin bread can be (and far be it from me to tempt you!). At any rate, at least I have an excuse to remake bread. And who wouldn't jump at the opportunity to revisit home and those elusive spring days of swings and bike rides.

Cinnamon-Raisin Bread

-1 pkg instant yeast
-1 c. warm milk (110F-115F)
-3 1/2 c. flour
-4 T butter, room temperature
-1/4 c. sugar
-1 egg
-1 1/2 t. salt
-1 1/2 t. cinnamon
-3/4 c. raisins

Filling:
-3/4 c. sugar
-1 T ground cinnamon

-1 egg, lightly beaten

In a small bowl, combine the yeast and the milk. Let bloom for at least 10 minutes. In stand mixer, combine flour, sugar, salt, and cinnamon. Stir to combine. Add the yeast/milk, butter, and egg. Dough should start to pull away from sides of the bowl. Switch to dough hook. Add in raisins, and knead dough in stand mixer for 5-6 minutes, or until springs (ha there's that word again!) back. Transfer the dough into a lightly oiled bowl, turn once to coat, and let rise until doubled in bulk... about an hour.

Turn the dough out onto a lightly floured surface. Pat out the dough into a large circle. Fold the dough in thirds, like a letter, turn dough 90 degrees and fold in thirds again. Let rise again for 30 minutes. Meanwhile make your filling by combining the sugar and cinnamon (if its a dry day, add a little smidge of water)

turn dough out onto that lightly floured surface again. Pat into a rectangle about 8"x11". Spread filling out leaving a 1/2" border on all sides. Fold the 11" sides in about 1/2". This fold creates a buffer so no filling will ooze out during baking. Then, roll the dough beginning at the 8" end. Pinch the dough together to seal the edge, and transfer to well greased loaf pan. Let rise another 20 minutes. Preheat oven to 425F.

Bake bread for 45 minutes, tenting with aluminum foil half way through baking. Cool in pan for 10-15 minutes before removing from pan. Wrap in a dry, clean towel and let finish cooling on a wire rack. Slice and Enjoy!

April 13, 2011

Making up for belated celebrations

Well, one unfortunate thing about living on your own is that you have to celebrate birthdays after- or before-the-fact. Its never really been a problem, but it seems a little ridiculous that we had to put off celebrating my mom's birthday for 3 weeks. (Clearly, medical school does not allow frequent visits home) Nonetheless, later is much better than never. So, on her first free weekend, mom came out to visit me here in KC, and by-golly, I was going to have a birthday cake ready for her!

Two things my mom wants in a dessert: dark chocolate and something that's not overtly sweet. Considering that I LOVE anything that's super sugary, that eliminated half of my cupcake and cake recipes. Then I found this one that I had saved from a year ago. I knew instantly that this was my mom's birthday cake: Strawberry and Vanilla Mascarpone Cake with Whipped cream and Chocolate Ganache.


The whipped cream frosting was just sweet enough to qualify the cake as a dessert, and the chocolate gave a great contrast to the strawberry cake. I think next time I revisit this cake, I would put a layer of strawberry jam in between the mascarpone layers.

Happy Birthday, Mom!

Strawberry-Vanilla Mascarpone Cake with whipped cream and chocolate ganache
recipe from: I don't remember it was so long ago!

Cake:
-6 eggs
-125 gms sugar
-1 t vanilla
-150 gms flour
-1 t. baking powder
-1/8 t. salt
-1 t. strawberry extract
-5-6 drops red food coloring


Mascarpone Filling/whipped cream:
-600 gms mascarpone, room temperature
-1 t. vanilla + 1/2 t. vanilla
-3/4 c. powdered sugar + 1/4 c. powdered sugar
-200 mL heavy cream, cold or well chilled


Ganache:
-1 c. dark chocolate
-1/4 c. heavy cream


Preheat oven to 375F. Grease and flour two 8 inch cake pans and set aside.
Sift together the dry cake ingredients and set aside. Beat eggs and sugar together until very thick! (~10 min). Add vanilla and strawberry extract and beat for another minute. Gently fold in sifted dry ingredients. Divide batter between cake pans. Bake for 30-35 minutes, or until an inserted tooth pick comes out clean. Let cool for 5 minutes, then remove from pans and let cakes cool completely.


Meanwhile, whip the mascarpone with powdered sugar and vanilla extract until well combined. Divide in fourths. Set aside.
Whip the cold heavy cream until stiff peaks form. Whip in 1/4 c. powdered sugar and 1/2 t. vanilla. Slowly whip in 1/4 of the mascarpone filling.
In a double broiler, melt chocolate. When melted, stir in cream. Set aside to cool before topping cake. 

To assemble:
Cut each cake in half horizontally to make 4 cake layers. Spread 1/4 of filling on one cake layer. Top with cake layer and another 1/4 of filling. Top with another cake layer and last 1/4 of filling. Top with final cake layer. Ice cake with whipped topping. (If you want to decorate with swirls like I did, reserve 1/3 c. and add a drop or two of red food coloring. Draw swirls on top of cake.) Using your cake pan, draw a circle in wax paper. Cut out circle just slightly smaller than pencil outline. Place circle lightly on top of cake. With a spoon drizzle ganache over sides of cake, letting the yummy chocolate drip over the sides.

Hope you enjoy it as much as we did!

April 1, 2011

Peanut Butter Cookies with Blackberry Jam-Miss Missouri Orientation

photo from Foodnetwork.com... we ate them too fast to get pics of them!

The only way anyone could improve upon the combination of either peanut butter and chocolate or peanut butter and jelly, is to, obviously, combine all three! Now, I can't take credit for this recipe, and I didn't change the original bit. If it ain't broke, I ain't gonna look for ways to fix it!


This past weekend was the Miss Missouri Orientation, in which all contestants come to learn the ins and outs of the competition. It's a blast meeting all the girls and hearing about what they've been up to as local titleholders. I had an equally wonderful time making cookies to share with the girls, board members, and everyone's family. So in between studying for my pathology test, I relaxed by making a load of cookies! Chocolate chip, oatmeal raisin, and sugar cookies shaped like crowns, like in my previous entry. But I couldn't forget my favorite cookie: Peanut Butter Cookies with Blackberry Jam. They were a hit!

Peanut Butter Cookies with Blackberry Jam
Recipe from Giada De Laurentiis

-1 c. flour
-1/3 c. unsweetened cocoa powder
-1/2 t. baking soda
-1/8 t. salt
-1/2 c. butter, room temperature
-3/4 c. smooth peanut butter, room temperature
-3/4 c. granulated sugar + 1/4 c.
-1/2 c. brown sugar
-1 egg, room temperature
-1 t. vanilla
-1/4 c. blackberry jam

Preheat oven to 375F. Line two cookie sheets with parchment paper and set aside. Sift together flour, cocoa, soda, and salt. Set aside.
Cream together the butter, peanut butter, 3/4 c. granulated sugar, and brown sugar until light and fluffy, scraping sides of bowl when needed. Mix in egg and vanilla. Stir in flour mixture.
Put the 1/4 c. granulated sugar in a bowl. Form two tablespoons of dough into a ball. Roll ball in sugar and place on prepared cookie sheet. Repeat with remaining dough. Using the handle end of a wooden spoon, press a hole into the center of each dough ball. Fill each hole with jam. Bake for 11-14 min. Cool on a rack for 5 min before removing from cookie sheet. Transfer to a wire rack to finish cooling.
ENJOY! (I know you will!)

March 27, 2011

Making yogurt more artsy: Strawberry Banana Cupcakes

I apologize for the grainy pics... my camera died so I used my cell phone :)
I love yogurt. And not the fat-free, loaded with pro-biotic stuff that is attempting to eliminate a need for fiber. I mean the real, thick yogurt that seems so hard to find now-a-days. To be honest, yogurt has been on my mind a lot recently. I'm sure you've seen the new Fage yogurt commercial; if not, you should! I love it! Where else can you find really good poetry set to artistic images. It teeters the border between artsy and fartsy, but I'm still loving it to the point that I will stop fast-forwarding my commercials on DVR to watch it. So here is the poem that has enraptured me in yogurt dreams:

Plain was the same as it ever was the same:
Plainly plain, samely same.
But then, someone lit the flame.
Plain rode away on lion's mane,
Where plain met fruits with strangely names,
Such wonderful things they did contain.
A shot of life to a hungry vein,
The captive beast that broke the chain,
And there upon that fruited plane
Is where plain become more than plain:
So much more than more than plain.
Plain will never be the same.

In honor of my new favorite commercial, my favorite flavor of yogurt in cupcake form: Strawberry Banana Cupcakes. It may not be fruits with "strangely names," but my fellow medical students remarked how different the flavor was for a cupcake. Hoping you'll find it "more than plain," too. :-)

Don't mind those cookies in the forefront... I'm mention those next post!

Strawberry-Banana Cupcakes
makes 20 cupcakes

Cake:
-1 1/2 sticks or 12 T. butter, room temperature
-1 1/2 c. sugar
-2 very ripe bananas
-2 t. vanilla
-2 eggs + 2 yolks
-2 1/4 c. flour
-1 t. baking powder
-1 t. baking soda
-1/4 t. salt
-12 T of milk

Strawberry filling:
- 3 c. frozen strawberries (if you use fresh, please see note in instructions)
-1/4 c. sugar
-2 T. corn starch

Strawberry Cream Cheese Icing:
- 1/2 (4oz) pkg cream cheese
-3 T. butter, room temperature
-4 cups powdered sugar
-2 t. vanilla
-2-5 T. milk, or until desired consistency is achieved

Make the filling first so it has time to cool: In a medium sauce pan, heat the frozen strawberries until almost softened. Add the sugar and corn starch. Cook, stirring occasionally, until sauce is thickened, like pie filling. Let cool. If using fresh strawberries, simply combine all ingredients in pan, stir to combine, and cook until thickened.
Preheat oven to 350F and line muffin pan with cupcakes liners.
Sift together flour, baking powder, baking soda, and salt; set aside. Cream together butter and sugar until light and fluffy. Mix in bananas, eggs, and vanilla. Add in half of flour mixture. Stir in milk. Add in rest of flour mixture. Pour into prepared pan. Bake for 18-20 min. Let cool completely before filling and cooling.
Meanwhile, prepare frosting by first creaming together the cream cheese and butter. Add in powdered sugar a 1/2 cup at a time until all incorporated. Add in vanilla and enough milk to achieve the desired consistency.

Now that your cupcakes are cool, you can either puree your filling until smooth and pipe-able, or leave as is. If pureed, using a long tip, pipe filling into cupcakes. If leaving as is, cut out a cone in the top of the cupcake and fill. Frost as desired.

Enjoy!

March 20, 2011

Cannolis, Champagne, and ...Cough Syrup?

March has been a month of recovery, be it from the massive blizzards we had in February, from finally having my wisdom teeth removed, and from a massive flu bug. It's crazy to think I've been away from my kitchen for a month... and strangely... I still haven't baked in it. Like the flu, when the baking bug hits you, it hits you hard, and this time, it hit me in my parent's lovely kitchen. While I'm proud of my rental oven, cabinets, and counter space, I will always love my mom's double oven, island, and two sinks. So, as I put away my tissues and cough drops, I gathered my parent's input, and they're favorite flavors, and let the next bug hit me. (I also hope you will all appreciate the pictures, mum and dad are diving into their photography hobby. The wonderful staging is their doing.)

Now, you may be wondering, why cannolis and champagne? First the cannoli: whenever mom and dad come back from their home state of Pennsylvania, they always talk about the amazing sweets, treats, and baked feats they got to try (the Amish still have the taste category won). This trip was a cannoli cake. To make it cuter, I tried to replicate it with cannoli cupcakes. :-)
As for the champagne: every year, twice a year, I model for a wedding runway show for David's Bridal. And every year, twice a year, I gorge myself on the wedding cake samples that accompany the wedding show. This year, mom and dad came with me, and shared in the cake gorging festivities. The winning flavor was, what else, but champagne. Again, I thought it was cuter as a cupcake. :-)
Both recipes were delicious! I would definitely recommend them for your next party, or the next time the baking bug hits you.


Cannoli Cupcakes
makes 16 cupcakes
adapted from Sugarcrafter

Cake:
2 1/2 c. flour
2 1/2 t. baking powder
1/2 t. salt
1 3/4 c. sugar
1/2 c. butter, room temperature
3 eggs
1 1/2 t. vanilla
1 T. Marsala wine
1 c. milk
1 c. ricotta cheese
1 t. orange zest
2 T. powdered sugar

Filling:
1 (15 oz) container ricotta cheese
1/4 c. powdered sugar
1 T. orange zest
1/2 c. finely chopped chocolate

Icing:
10 T. butter, room temperature
1/2 vanilla bean, halved lengthwise, seeds scraped and reserved
1 1/4 c. powdered sugar
1/8 t. salt
1/2 t. vanilla extract
1 T. heavy cream
1 c pistachios, finely chopped, for garnish

Preheat oven to 375F. Line muffin pan with cupcake liners.
Sift together all dry cake ingredients. Set aside. In a stand mixer, cream together butter and sugar. Mix in eggs, vanilla, Marsala wine, milk, zest, ricotta cheese, and powdered sugar. Slowly add the dry ingredients and mix until just combined. Pour into prepared pan. Bake for 20-25 min. Cool completely before filling and icing.
Meanwhile, in a med bowl, stir together all filling ingredients until well combined. Set aside until cupcakes are ready to fill.
To prepare icing, beat butter with vanilla bean seeds and salt. Mix in powdered sugar. Add vanilla and cream. More cream may be added to achieve desired consistency.
To assemble. cut a cone out of the cooled cupcake. Fill with ricotta mixture. Frost with icing. Garnish with pistachios.

Champagne Cupcakes with Champagne Icing
makes 12 cupcakes (or 36 mini cupcakes)
adapted from Allrecipes

Cake:
2 3/4 c. flour
3 t. baking powder
1 t. salt
2/3 c. butter, room temperature
1 1/2 c. sugar
3/4 c. champagne
6 egg whites

Icing:
3 1/2 c. powdered sugar
1 c. butter, room temperature
1/2 t. vanilla extract
3 T. champagne

Preheat oven to 350F. Prepare muffin tin with cupcake liners. Sift dry ingredients together and set aside. In a stand mixer, cream together the butter and sugar. Alternate adding dry ingredients and champagne. In a separate bowl, whisk egg whites into soft peaks. Fold into batter. Divide batter into prepared pan and bake 18-20 min. Cool completely before frosting.
Meanwhile, prepare icing by beating butter. Slowly add the powdered sugar until well incorporated. Add in vanilla and champagne.  If icing is too stiff, add milk until reaches desired consistency. 

Enjoy your bug!

February 4, 2011

Finding something to pay money for. Butterscotch Cupcakes

I cannot believe that it has been before Thanksgiving that I last posted.  Believe me, it's not for lack of baking or trying new recipes, nor for lack of wanting to post. It was for lack of HAVING anything to post. Let me explain:

Now that all my family and friends read my blog, I've been getting tons of requests to make them recipes from my previous blog posts.  Finding any excuse to bake (and to make some easy Christmas presents), I will always happily oblige and shower everyone who asks with as many baked goods as my oven and Kitchenaid can handle. The only problem is I get about one day a week to bake, and how can re-baking an item I just made a few posts ago make a sufficient new post? In hindsight, I should have taken pictures with all my friends and family who I remade my recipes for. Then I would have had something to post, right? At any rate, the most popular posts: Apple Cinnamon Rolls and Vanilla Chai Tea Cupcakes.  I would strongly recommend both (and of course, would gladly make them for you too!).

When I wasn't remaking my posts, I was dabbling in new recipes, none of which I liked. Whenever my grandfather would really like a meal, he would exclaim "That's something I'd pay money for." When I started this blog, I promised myself that I would never post something that I "wouldn't pay for." And let me tell you, these recipes were not worth much. First, I tried meringues with a roasted berry sauce. I found them decent, but nothing that I would want to make again (or ever serve my grandfather, that's for sure!). The meringues could have used some lemon zest, because without the berries, they were bland and not worth the calories. Next, I made gingerbread cupcakes with an orange-cream cheese frosting. Again, bland. Also, the frosting had a strange texture with the orange zest. It lacked the smoothness I look for in a good frosting. Personal preference? Perhaps, but I still wouldn't pay money for it. Two weeks ago, I tried a blood orange bar (sort-of a lemon bar recipe, but with blood oranges instead of lemons). This disappointment I should attribute not to the recipe itself, but to the oranges. Yes, I knew they were out of season, but they were on sale (and I can never resist a sale!). They had that unripe sour taste, lacking the sweetness of ripe blood oranges. Even then, I didn't love the recipe as a lemon bar, so I certainly was not going to post the recipe as a failed blood orange bar.

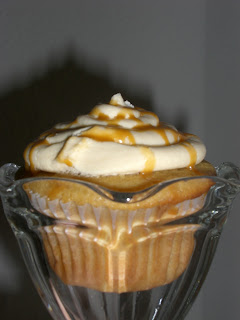
So last week, I needed to redeem myself (if to no one else, then myself!). I went with a recipe I was 100% confident would always come out delicious: Butterscotch cupcakes. Finally, SUCCESS!


Butterscotch is my dad's favorite flavor, besides cheesecake. Originally, I tried this recipe for a Harry Potter party (it was a Butterbeer cupcake recipe). I took my remaining cupcakes home to Columbia to share with my parents. Dad exclaimed that they were the best butterscotch dessert he ever had, and immediately took a second one after he finished his first. In my dad's way, I think he just told me that he would pay money for those cupcakes.

Fair warning, these are intensely butterscotch-y. If you don't like butterscotch, these aren't for you. However, if your family is like mine, hopefully they'll want to pay you for these, too.

Butterscotch Cupcakes
(from Amybites- Butterbeer Cupcakes)

Butterscotch Cupcake:
2 c. flour
1 1/2 t. baking powder
1/2 t. baking soda
1/4 t. salt
1/2 c. (1 stick) unsalted butter, softened
1/2 c. granulated sugar
1/2 c. dark brown sugar, packed
3 eggs
1 1/2 t. vanilla
1 t. butter flavoring (found in popcorn aisle)
1/2 c. buttermilk
1/2 c. cream soda (I recommend Stewart's)
Butterscotch filling:
1 11-oz. package butterscotch chips
1 c. heavy cream
Butterscotch frosting:
1/2 c. (1 stick) unsalted butter, softened
1/3 c. butterscotch ganache
1 t. vanilla
1 t. butter flavoring
1/8 t. salt
4 c. powdered sugar
Splash of milk (enough to achieve right consistency)

 Preheat oven to 350F. Combine dry, and set aside. Cream butter and sugars for about 3 min. Mix in eggs, one at a time. Add vanilla and butter flavoring. Alternate adding dry ingredients, buttermilk, and cream soda (for example: add 1/3 of dry, add 1/3 of buttermilk, add 1/3 of soda, add 1/3 dry...etc.). Pour into lined cupcake pan. Bake for 15-17 min. Let cool completely before removing from pan. 

Meanwhile, melt the butterscotch chips with the cream in a double broiler until entirely smooth. Process should take 10 min. Cool completely. Fill a squeeze bottle with ganache, inset into center of cupcake, and fill cupcake until ganache comes out the top of the new hole. 

Cream the butter for the frosting. Then, add the ganache, vanilla, butter flavoring, and salt. Mix well. Beat in the powdered sugar, 1/2 cup at a time. Add milk until frosting reaches the desired consistency to frost your cupcakes.

Drizzle frosted cupcakes with remaining butterscotch ganache (or save to put on your ice cream). :)

Enjoy!