Pages

November 23, 2010

Cherry Pie and Chocolate Chip Cookies. Happy Birthday Ty!

It's hard to believe that I met Ty when he was 20.  Three years... are you kidding me?!? And I haven't aged a day, I'm sure. Anyway, most of these birthdays have consisted of baked goods and homemade birthday cards.  Whether savored or cherished, I wouldn't trade his homemade birthday gifts for the world, each unique and adorable. But, for all three years, he has asked me to make him the same thing: cherry pie and chocolate chip cookies.

First, I have to have the girl moment where I gush about how amazing my boyfriend is.  But really, who else would do all my dishes for me or eat my apricot ribs after I burnt them (probably beyond what I would consider edible)? Who else would support my dreams of becoming a doctor as well as comfort me when I trip and spill most of the cupcakes I made? I have been extremely blessed to share these 3 years with him. And, I can't wait to see what the next 3 birthdays and beyond will bring!


Chocolate Chip Cookies and homemade cards are really what brought us together.  We met in Cell Biology and soon bonded over ways to entertain each other during review sessions every week. Our favorite pastime: telling jokes. Our favorite joke: "Why did the cookie go to the doctor?...Because he was feeling crumb-y!" Anyway, after our first date I made him chocolate chip cookies accompanied with a homemade card with this joke. (I think my cookies earned me a second date) :-). You know how everyone has their comfort food? I think chocolate chip cookies are Ty's comfort food, and I love making these for him whenever he needs or wants them

I really don't know why the cherry pie tradition started, but I do know that if Ty had a choice of either cake or pie, pie would win every time. Ever since my Nana first taught me how to make pie, I have been obsessed with tender, flaky crusts. But, B.T. (or before Ty) I had never made a cherry pie (but I wasn't about to admit that!).  Fortunately, I found a great recipe that I was proud to make him for his 21st birthday, and so the tradition began. If you are feeling wary toward cherry pie in general because of the gelatinous mess that is store bought pies, I promise, this pie will convert you into a cherry lattice pie aficionado. It's easy; it's quick; and it's delicious.  As long as he keeps loving his birthday gifts, I will love making them for him.  Happy Birthday, Ty!


Chocolate Chip Cookies
makes 3 dozen
-1/3 c. butter, room temp
-1/3 c. shortening
-1/2 c. granulated sugar
-1/2 c. brown sugar
-1 large egg
-1 t. vanilla
-1 1/2 c. flour
-1/2 t. salt
-1/2 t. baking soda
-12 oz. chocolate chips (or as many or as little as you want)

Preheat oven to 375 F. Cream butter, shortening, and sugars for 3 min or until light and fluffy.  Mix in egg and vanilla. Whisk together flour, salt, and baking soda.  Add dry ing. to the creamed mixture.  Mix in chocolate chips and stir until just combined and chips are evenly distributed. Bake for 8-10 min. Cool on pan for 1 min, then remove to wire rack to completely cool.


Cherry Pie
Crust:
-2 1/2 c. flour
-1 c. (2 sticks) butter, very cold
-1 T. sugar
-1 t. salt
-enough ice water to just bring dough together (about 5 T.)

Combine all dry ing. Cut in butter until mixture resembles course meal. Add just enough water that dough can be formed into a ball and rolled out easily.  Roll into a ball, wrap in plastic wrap, and chill for 1 hour. Divide into 2/3 and 1/3 balls. Roll out 2/3 of the dough to make bottom crust and place in 9" pie plate.  Roll the rest of the dough into a circle and cut into ribbons.

Filling:
-4 c. frozen cherries (I mix 2 cups tart and 2 cups sweet to balance the flavor)
-1/2 c. water
-1/2 c. sugar
-2 T. cornstarch
-1/2 t. almond extract
egg wash: 1 egg well beaten

In a medium saucepan, cook the cherries in the water for 15 min over medium heat. Meanwhile, combine the sugar and cornstarch.  Add sugar mixture to the cherries and cook until thickened (5-8 min). Off the heat, stir in the almond extract.  Let cool slightly before pouring into prepared pie plate.

Preheat oven to 350F. Weave the ribbons of crust dough over the filling to create a lattice pattern.  Cover the crust with aluminum foil and bake for 25 min.  Then remove foil from crust and brush with egg wash.  ( I got lazy and didn't use the egg wash... see how white my crust looks?... wouldn't golden brown be more appetizing?... I wouldn't suggest skipping this step). Sprinkle with sugar.  Bake another 25 min.  Let cool 4 hours before serving. Enjoy!!

November 16, 2010

Apple Cake with Maple Glaze and Apple Pie Cupcakes with Vanilla Ice Cream Buttercream

Starting last week, nothing excited me more than baking with my apples! Then, Microbiology happened.  Oh surely you remember my complaints opinions directed at this course's tests from Nana's Chocolate Cake entry. Well, this test was no different (I mean really, who uses words like insidious in test questions. I think choices A-J is challenge enough!).  But, what doesn't kill you makes you stronger.  Truly, I have nothing to complain about.  Yes, the test was difficult, but I have a wonderful teacher who cares enough about all of our board scores to make sure that we have tests that show us if we know the material backwards as well as forwards. Regardless, I'm blessed just to be in medical school and pursuing a career I've dreamed about since I was 4. Anyway, after 3 days of locking myself in my apartment to study, not baking, blogging, or breathing, I emerged from my test yesterday, triumphant, yet exhausted, and WAAAAYYYY behind on my blogging.  So here I go, attempting to squish two days worth of baking into one entry.

When last I posted, I was gearing up for Apple non-brownies. Promising Apple Bars with a brownie like consistency, this recipe lacked the dense, cookie/cake combo I expected it to be.  The icing was delicious; the cake was light and moist; the recipe was simple; the dessert was everything that you should expect from a cake, but not from a "bar." Would I make this recipe again? Yes, but only if I was craving cake, and not if I was craving a denser dessert.

Also, I think the cake needs the nuts. I cut out the nuts, because I can't eat them (I'll admit, it's not because of allergies or other medical/physical limitation, but because I have a textural limitation. Chopped nuts, cottage cheese, and EZ cheese are all ingredients I will never use because I can't stand their texture on my tongue!). But, my non-brownie was missing a contrast through the light cake and the sweet frosting. So, I'm leaving them in the recipe!

Next, the Apple Pie Cupcakes: Apple pie holds a close spot in my heart.  It was the first pie I had ever learned to bake (of course, by Nana's side). Apple pie was also the first dessert I made Ty's parents when he invited me home to meet them. Shortly after, my apple pie was requested at every birthday party for Ty's Father (who also has me learning how to bake with Splenda). It is safe to say that apple pie is my go to recipe. But, after my 5 pound purchase at the beginning of last week, I only had 3 apples left (not enough to make an apple pie). :-(  So I went recipe searching, and couldn't have been happier when I found this recipe from Annie Eats. I love following Annie (as well as trying most of her recipes), and love how she transformed apple pie into a delicious cupcake! I also found an excuse to try out my new vanilla ice cream frosting recipe!!!

The cupcake alone taste like a sugar cookie, which worried me that the cupcake would be almost too sweet when I filled it with apple pie filling and topped it with frosting. (I think this fear stemmed from Microbiology: when I brought in chai tea cupcakes to class, I gave the biggest and most frosted to my Micro professor who stated, "I know why those are 100% vegan; it's because they're 90% sugar." I learned my lesson that biggest and sweetest is not always the best). But, the apple pie filling was more savory than sweet; the cinnamon tones over thick caramel-y sauce complemented the apples without over-sweetened the filling. And the frosting was the perfect complement!

Apple Cake
Cake
3 eggs
1/4 t. salt
1 3/4 c. sugar
1 c. vegetable oil
2 c. sifted all-purpose flour
1 t. baking soda
1 t. ground cinnamon
1/2 t. nutmeg
3 c. chopped unpeeled apples (I used Golden Delicious... and it was delicious!)

1/2 c. chopped walnuts
1 t. vanilla extract

Maple Glaze
1 c. sifted powdered sugar
1 T. butter, softened
2 tablespoons whole milk
1 t. maple extract


Preheat oven to 350F. Grease a 13x9 cake pan. Set aside.
Mix together the eggs and salt for 1 min.
Add the sugar and oil, and beat until blended.  In a medium bowl combine the flour, baking soda, cinnamon and nutmeg.  Add the flour mixture to the egg mixture, and beat just until combined. Fold in the apples, nuts, and vanilla.  Bake for 25 min or until an inserted toothpick comes out clean.  Let cool before frosting... or glazing as it were. 
In your stand mixer, cream the butter.  Slowing add the sugar 1/4 c. at a time.  Add extract and mix. Then add enough milk to create a spreadable glaze (should be thinner than icing). Spread over cake. 

Apple Pie Cupcakes


Cupcakes:
3 c. sifted cake flour
1 T. baking powder
½ t. salt
1 c. unsalted butter, at room temperature
2 c. sugar
4 eggs
1 ½ t. vanilla extract
1 c. milk
Apple filling:
2 T. butter
2 t. cinnamon
2-3 T. sugar
3 large Granny Smith apples, peeled, cored and diced (or once again, Golden Delicious!)


To make the cupcakes, preheat the oven to 350°.  Line two cupcake pans with paper liners.
In a medium bowl, sift together the cake flour, baking powder and salt.  In the bowl of an electric mixer, cream the butter and sugar together on medium-high speed until light and fluffy, about 2 minutes.  Beat in the eggs one at a time, mixing well and scraping down the sides of the bowl after each addition.  Add the vanilla extract and mix well to combine.  Add in the dry ingredients alternately with the milk, beginning and ending with the dry ingredients.  Stir until just combined.
Divide the batter evenly among the cupcake liners, filling them about 2/3-3/4 full.  Bake until golden and a toothpick inserted in the center comes out clean, about 18 to 22 minutes.  Remove from the oven and allow to cool for 5 minutes in the pans.  Transfer to wire racks to cool completely.
To make the apple filling, heat the butter a medium skillet over medium-high heat.  Add the cinnamon and sugar and cook for a minute, until the mixture begins to bubble.  Lower the heat to medium and stir in the apples.  Mix well.  Cook until the apples are somewhat tender, about 10 minutes.  Remove from heat and let cool.
While the apple mixture is cooling, use the cone method to remove a chunk from the center of each cupcake, making sure to leave a rim around the top of the cupcake.  Fill the holes with the cooled apple mixture.  To decorate, top each cupcake with a swirl of buttercream.

Vanilla Ice Cream Buttercream
recipe by Amanda

2 1/2 sticks of unsalted butter
2 1/2 c. powdered sugar
Pinch of salt
1 t. vanilla
1 T. melted vanilla ice cream
1 T. milk (as fatty as you got it)

Cream butter and salt. Add sugar 1/4 c. at a time. Add vanilla, ice cream, and milk, stirring until combined after each addition. Beat for 3-5 min or until light, fluffy, and pipe-able. 

Enjoy!

November 9, 2010

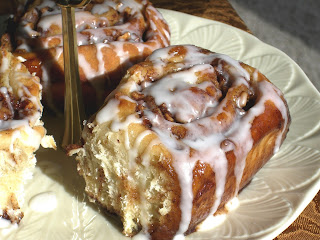
Moving on and Moving in-- Apple Cinnamon Rolls


Lessons I have learned when moving: 1) always have strong friends to help move your couch, dresser, and shoe collection. 2) Find out before hand if your new Papa Johns pizza delivers to your new apartment. 3) expect to lose your day planner for a few days, and have your events backed up in your smart phone. 4) do not move when you have a neurosciences test the same week or when you can't take off clinic duty. 5) do not disconnect your internet or cable in your old apartment until you are absolutely sure the cable guy will be at your new apartment the next day. 6) when you finally get to go to the gym, church, or grocery store after you are all moved, expect people to be worried about where you have been for the past week. 7) do not extend moving out over a week long period, even if you justify that "moving a little bit at a time won't be too bad and I'll hardly notice that I'm moving" (LIES!).

My new backyard... the scenic river/forest view was another reason I am very excited about my apartment!

Despite the stress, bruises, and misplaced items, I am very excited to be in my new apartment. I am even more excited about the HUGE kitchen in my new apartment (which may or may not be the sole reason why I made sure that my finances for the next year could stand a $100 increase from my previously budgeted rent). As soon as I unpacked my Kitchen Aid mixer, I was set on starting my new theme for this week: APPLES!

Along with color-changing leaves, crisp jacket weather, and football, apples are one of the first things I think of when fall comes around. My eyes are always bigger than my stomach, though, when it comes to buying apples (mostly golden delicious... YUM!) at the grocery store.  I mean really, how can you resist 5 pounds of apples for $3.50?!  Using my weekly apple excess, I have created and experimented with dozens of apple-based and fall-inspired desserts. One of my favorites is my mom's cinnamon roll recipe, doctored up with some chopped apples. 

Mom makes some of the most amazing "sticky buns" (as she calls them), from a recipe inspired by my family's roots in the Pennsylvania Dutch area.  I can remember going to the farmer's market in Allentown, PA (my dad's hometown) and tasting all the wonderfully sweet, flaky, tender, moist, and golden brown delicious baked goods from our favorite Amish family's stand. Although I loved almost everything they made, I still thought that their sticky buns and cinnamon rolls couldn't hold a candle to mom's. I think adding the apples took a family breakfast favorite, and made it more fall friendly.  While mom typically makes her sticky buns with pecans added to the topping and filling, I can't eat nuts, so I left them out. Still, I hope you enjoy my start to apple week!


Apple Cinnamon Rolls
makes 12 large rolls

Dough:
-2 c. milk (heated to 110F)
-1 pkg active dry yeast
-1/3 c. sugar
-2 t. salt
-6 1/2 c. flour
-2 eggs
-1/4 c. butter, at room temperature
Filling:
-1 c. sugar
-1 c. brown sugar
-3 T. ground cinnamon
-1/4 t. ground nutmeg
-1/4 t. ground cloves
-2 c. very finely chopped apples.
-1/4 c. butter, melted
Glaze:
-1 c. powder sugar
-2 T. milk
-1 t. clear vanilla
Add yeast and sugar to heated milk in a stand mixer with paddle attachment. Gently stir to dissolve and let bloom 5 min.  Add salt and 2 c. flour.  Beat 2 min.  Beat in eggs and butter. Stir in remaining flour, 1/2 c. at a time.  When dough starts to come together, switch to a dough hook.  Knead dough for 5 min or until smooth and elastic.  Spray a large bowl with cooking spray.  Move dough into the bowl, turning once to coat with spray. Let rise for 1 hour or until doubled (Here's a nifty trick for letting your dough rise in a draft-free, warm environment.  Turn on your oven to 350F for 5 min, then turn the oven off and leave the door open for 1 min. Your oven should not have preheated all the way to 350F, but will have warmed the oven enough to help the dough rise.  Place dough in a heat safe bowl in the oven and close the oven door.).
Roll dough out into a 1/4" and in the shape of a large rectangle. Brush the dough with half of the melted butter, leaving a 1" border around the edges.  Combine all filling ingredients and spread evenly over the butter. Roll the dough up lengthwise.  Cut into 12 equal rolls.  Place rolls in a greased 13x9 baking dish.  Let rise another hour.
Preheat oven to 350F.  Brush the rolls with the remaining butter.  Bake for 40 min or until golden brown. Meanwhile, combine all glaze ingredients in a small bowl. Drizzle the somewhat cooled rolls with the glaze.

Enjoy!

Next up: Apple Cake/non-chocolate brownies!